Before you can do anything with navigation, the typical first step is to make a map.
Start from the Charging Dock
The navigation system assumes that the map origin (0,0) is the charging dock, so make sure Oculus Prime is docked before starting mapping.
Get started by connecting to Oculus Prime via the remote browser interface and going to 'MENU > Navigation'
Enable Navigation
If the navigation menu isn’t showing, enable it by going to:
'MENU > settings/calibration > enable navigation menu'
Enable Telnet
The telnet interface needs to be enabled by going to:
'MENU > settings/calibration > enable telnet on port 4444'
Restart the application, if either of the above settings are changed, by going to:
'MENU > server > restart server application'
Start Mapping System
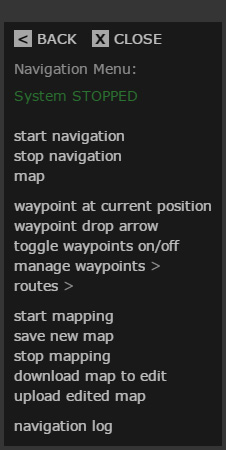
In the navigation menu, click on 'start mapping' – you should see the green status text change to 'System STARTING'
Wait a minute or two for it to read 'System MAPPING' then click on 'map' – you might have to zoom/pan around a bit to find the origin and first scan, and then you should see something like this:
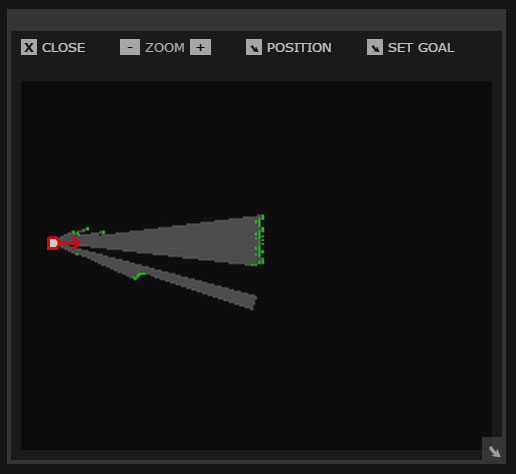
When mapping, the orange and white marker indicates the origin of the map only, it doesn’t move while you’re creating the map (when navigating, the same marker indicates the position of Oculus Prime).
Start manually driving around the area you want to map. You’ll notice driving is a bit different than usual: the robot forces full stops between direction changes (this is required for accurate odometry when using skid steering). Also, speed is fixed at optimal mapping/navigation speed (slightly slower than full speed).
While driving, you can watch the map building progress in the map window (though it tends to lag a several seconds behind). Making a good map can take a bit of practice – some guidelines are listed below:
Map Making Driving Tips:
- Start by driving around the perimeter of the first room the robot is in, at least 3 laps in the same direction
- Then branch out into other areas and do a few laps there, then come back to the original area
- It helps to keep distinguishing features such as corners within view as much as possible (imagining a horizontal scan as seen from top view)
- Once you’ve driven in one direction a few times around the perimeter of an area, turn around and go in the opposite direction to fill in the missing scans
Don’t be too discouraged if the map isn’t perfect – the underlying ROS AMCL localization algorithm, that the navigation system uses, is fairly robust and can deal with somewhat wonky maps (and you can always touch up the map later using a bitmap editor).
Saving the Map
Once you’ve patiently driven around for a while and you’re reasonably satisfied with the map, save it by clicking 'save new map' in the navigation menu (this will prompt to overwrite and backup an existing map whether there is one or not).
Maps are saved in the 'oculusprime' ROS package directory, under the 'maps' sub-folder.
Shut Down Mapping System
AFTER saving the map you can shutdown the mapping system by clicking 'stop mapping' in the navigation menu (if you do this before saving, you will lose the new map data, and revert to the old map if there is one, and you’ll have to start again from scratch).
You’re now ready to use the map for navigation!
Editing the Map
After testing the map with the navigation system (see next page), you might find you wish there are some features that should be added or deleted. To do this, you can download the map file and edit it with a standard bitmap editor.
To download to a remote computer, click on 'download map to edit' from the navigation menu. This will download the file 'map.pgm' which is a standard bitmap file that can be edited with a bitmap editor such as Gimp in Linux, or Adobe Photoshop in Windows/OS X (or any editor that supports the PGM format).
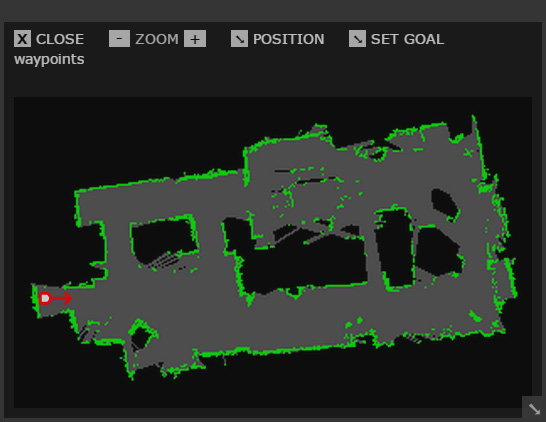
When opened in an editor, the actual image is greyscale. Black represents objects, white is known navigable space, and grey is unknown. Here is the same map with some features added to reduce navigation ambiguity, as it looks in the editor:
The mapping process had only scanned the spindly legs of the large table and chairs in the top center of the map, so the navigation system was occasionally choosing the wrong path in that area. Outlining the table and cutting off tight routes between the table and the wall helps. It also helps to draw object lines to fill in the blanks between navigable and unknown space, to prevent the path planner from driving through the unknown between navigable areas.
Upload Edited Map
Once editing is complete, save it with the same filename then click 'upload edited map' in the navigation menu to use the modified map with the navigation system.
NEXT: Navigating the Map and Defining Waypoints